Generally. Should the root account be locked out, SSH and UI/client access to the host fails. In order to work this around
- Bring up a Console session to the Host and enable Esxi Shell (under troubleshooting options)
- on the console session, press ALT+F1,
- log in as root and password:
- In order to unlock the root
account and determine the last log on failure, type the below:
- /sbin/pam_tally2 -r -u root
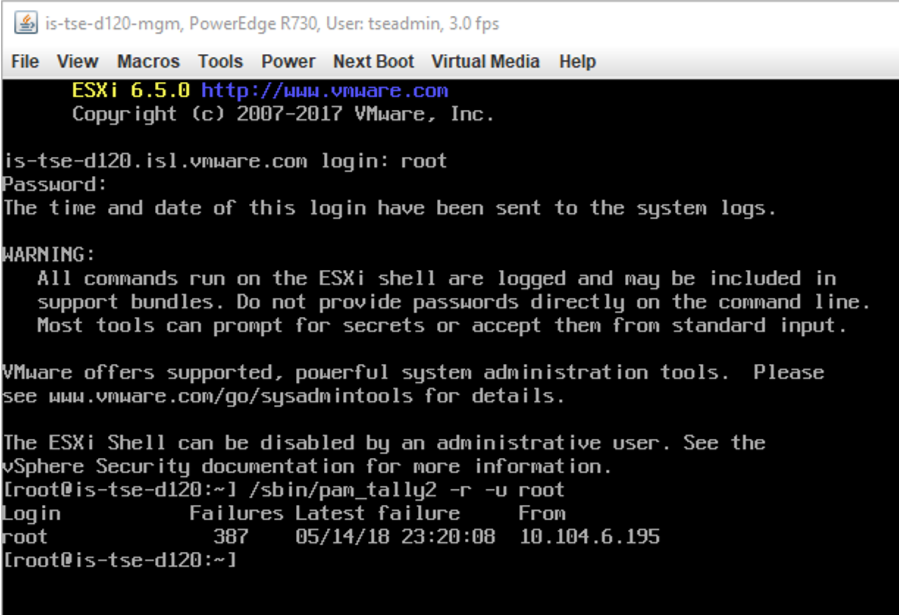
The root account should now be unlocked. Review the IP listed there to prevent logon(scripted or 3’rd party monitoring)