Quick Tip: Did you know you can use an NFS path as an the offline depo on fleet management?
To achieve his, we will need to mount the NFS share containing the repository on to Fleet management.
Start with SSH to VCF9 appliance:
Create NFS Mount Directory:
mkdir /mnt/vcf9
Mount NFS path containing VCF9 Repo
mount {{nfs_ip}}:/path/to/share /mnt/vcf

Note: In my case, the VCF repo was within the 9010 Directory, So in VCF operations UI > life cycle > VCF management > Depot Configuration > Ive set up the Depo path /mnt/vcf9/9010

note: It is crucial that the directory structure in the depot directory must follow the same structure as the offline OBTU or the directory structure as provided in vcf-9.0.1.0-offline-depot-metadata.zip (downloaded from support.broadcom.com). you may place the binaries (ova/tar/upgradepackages within the directory “PROD/COMP/{{PRODUCT}}/{{file.extension}}
Eg:
root@fleet [/mnt/vcf9/9010]# ls PROD/COMP/VIDB/
vidb-external-9.0.1.0.24941398.tar
now Switch to Binary Management > Install Binaries: Give it a min or two and you should start seeing all binaries for download
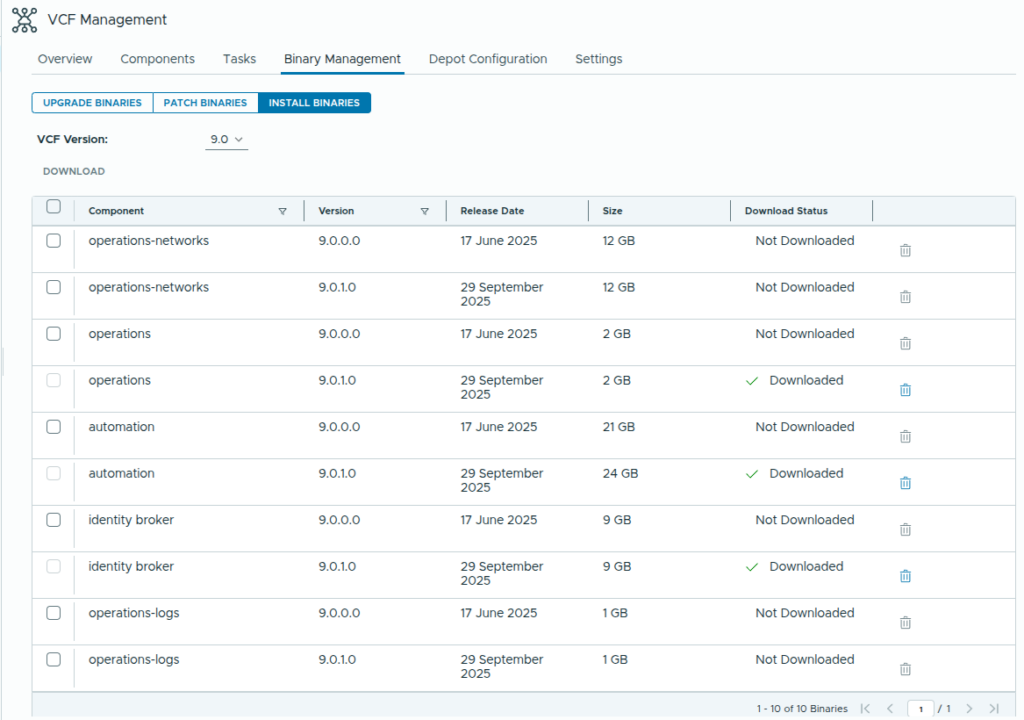
Note: This data is picked up from metadata, for the download to actually work, the directory “PROD/COMP/{{PRODUCT}}/” MUST contain the respective binaries.